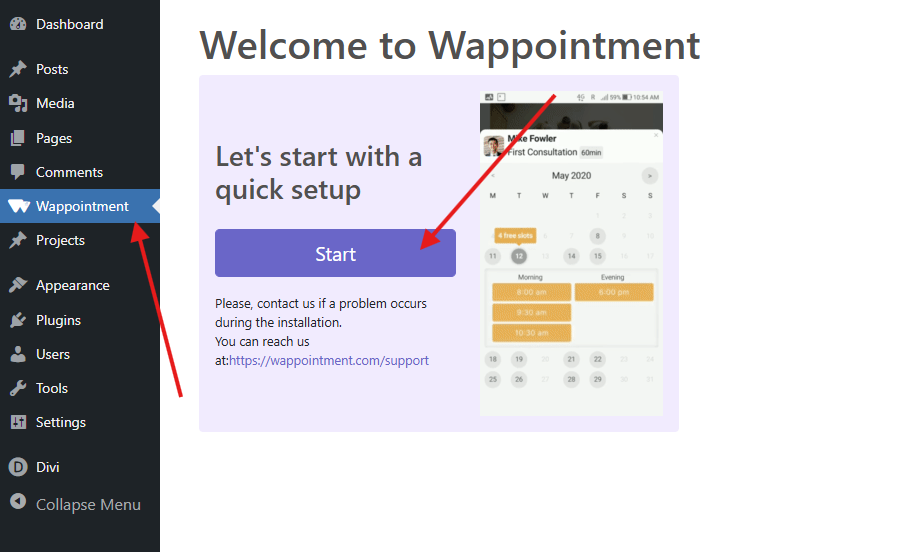
Step 1 – Open the Wappointment Settings
Go to your WordPress Dashboard > Wappointment.
If Wappointment doesn’t appear in the menu, go to Plugins > Installed Plugins and make sure Wappointment is activated.
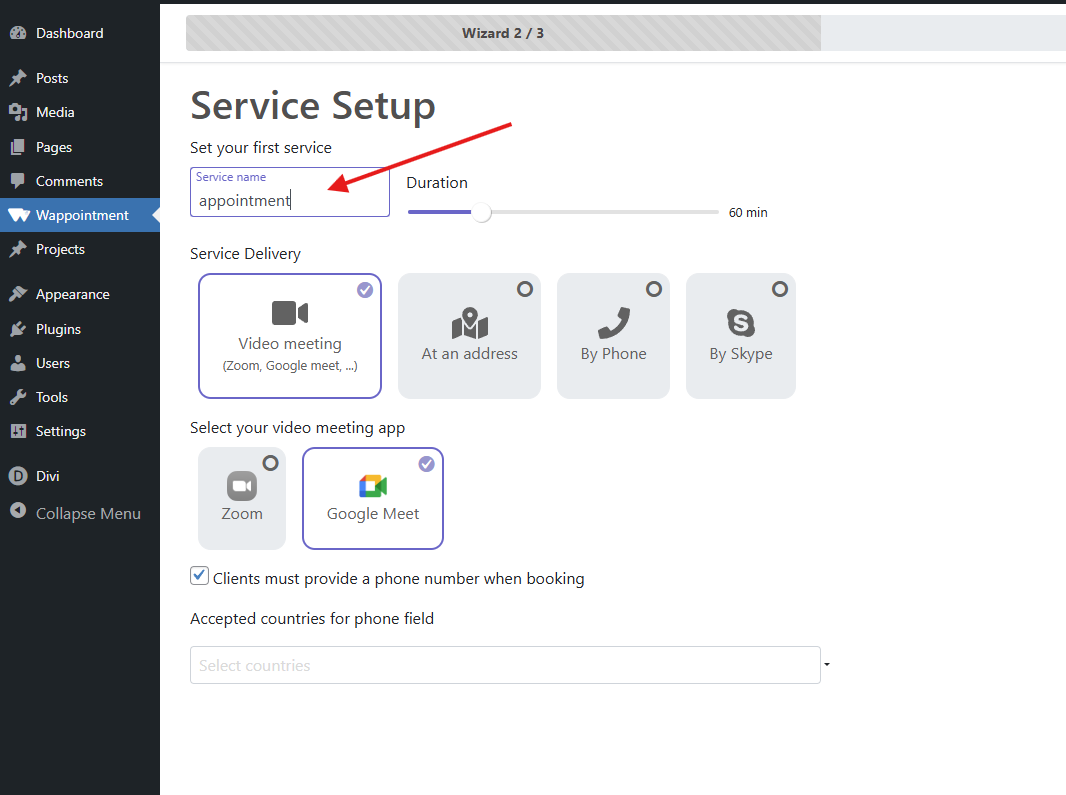
Step 2 – Go Through the Quick Setup Wizard
Once activated, Wappointment will launch a setup wizard.
You’ll be asked to configure:
-
Your time zone
-
Booking duration (e.g., 30 min or 60 min)
-
Your availability (days and hours you’re open for bookings)
-
Your meeting platform (Zoom, Google Meet, or phone call)
☕ Tip: If you offer discovery calls, you can limit availability to specific hours or days.
Step 3 – Customize Your Services
-
Go to Wappointment > Services
-
Edit the default service or Add New Service:
-
Name: Discovery Call, 1:1 Coaching, etc.
-
Duration
-
Price (optional)
-
Description
-
-
You can also choose a specific calendar color for each service.
Step 4 – Connect Your Calendar (Optional but Recommended)
-
Go to Wappointment > Calendar Sync
-
You can sync with Google Calendar to avoid double bookings.
-
Follow the instructions to authorize your Google account.
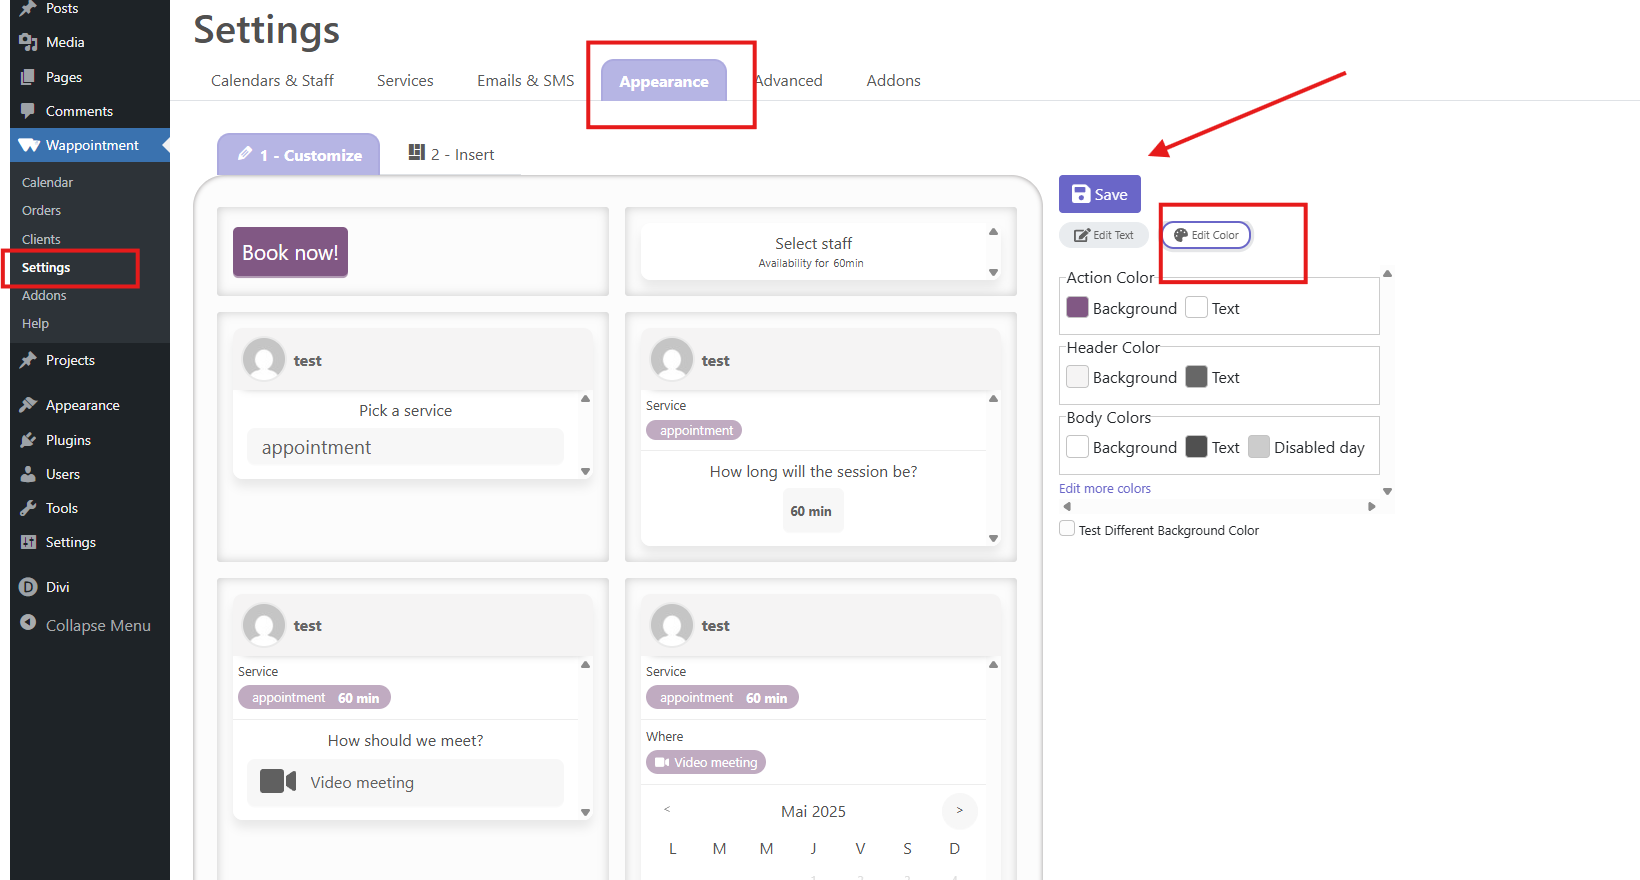
Customize Colors & Branding
From the Wappointment dashboard:
-
Click “Customize your booking form”
-
Choose your brand color, text color, button shape, and more
-
Preview live changes on the right panel
Tip: Match your site’s aesthetic for a seamless user experience.
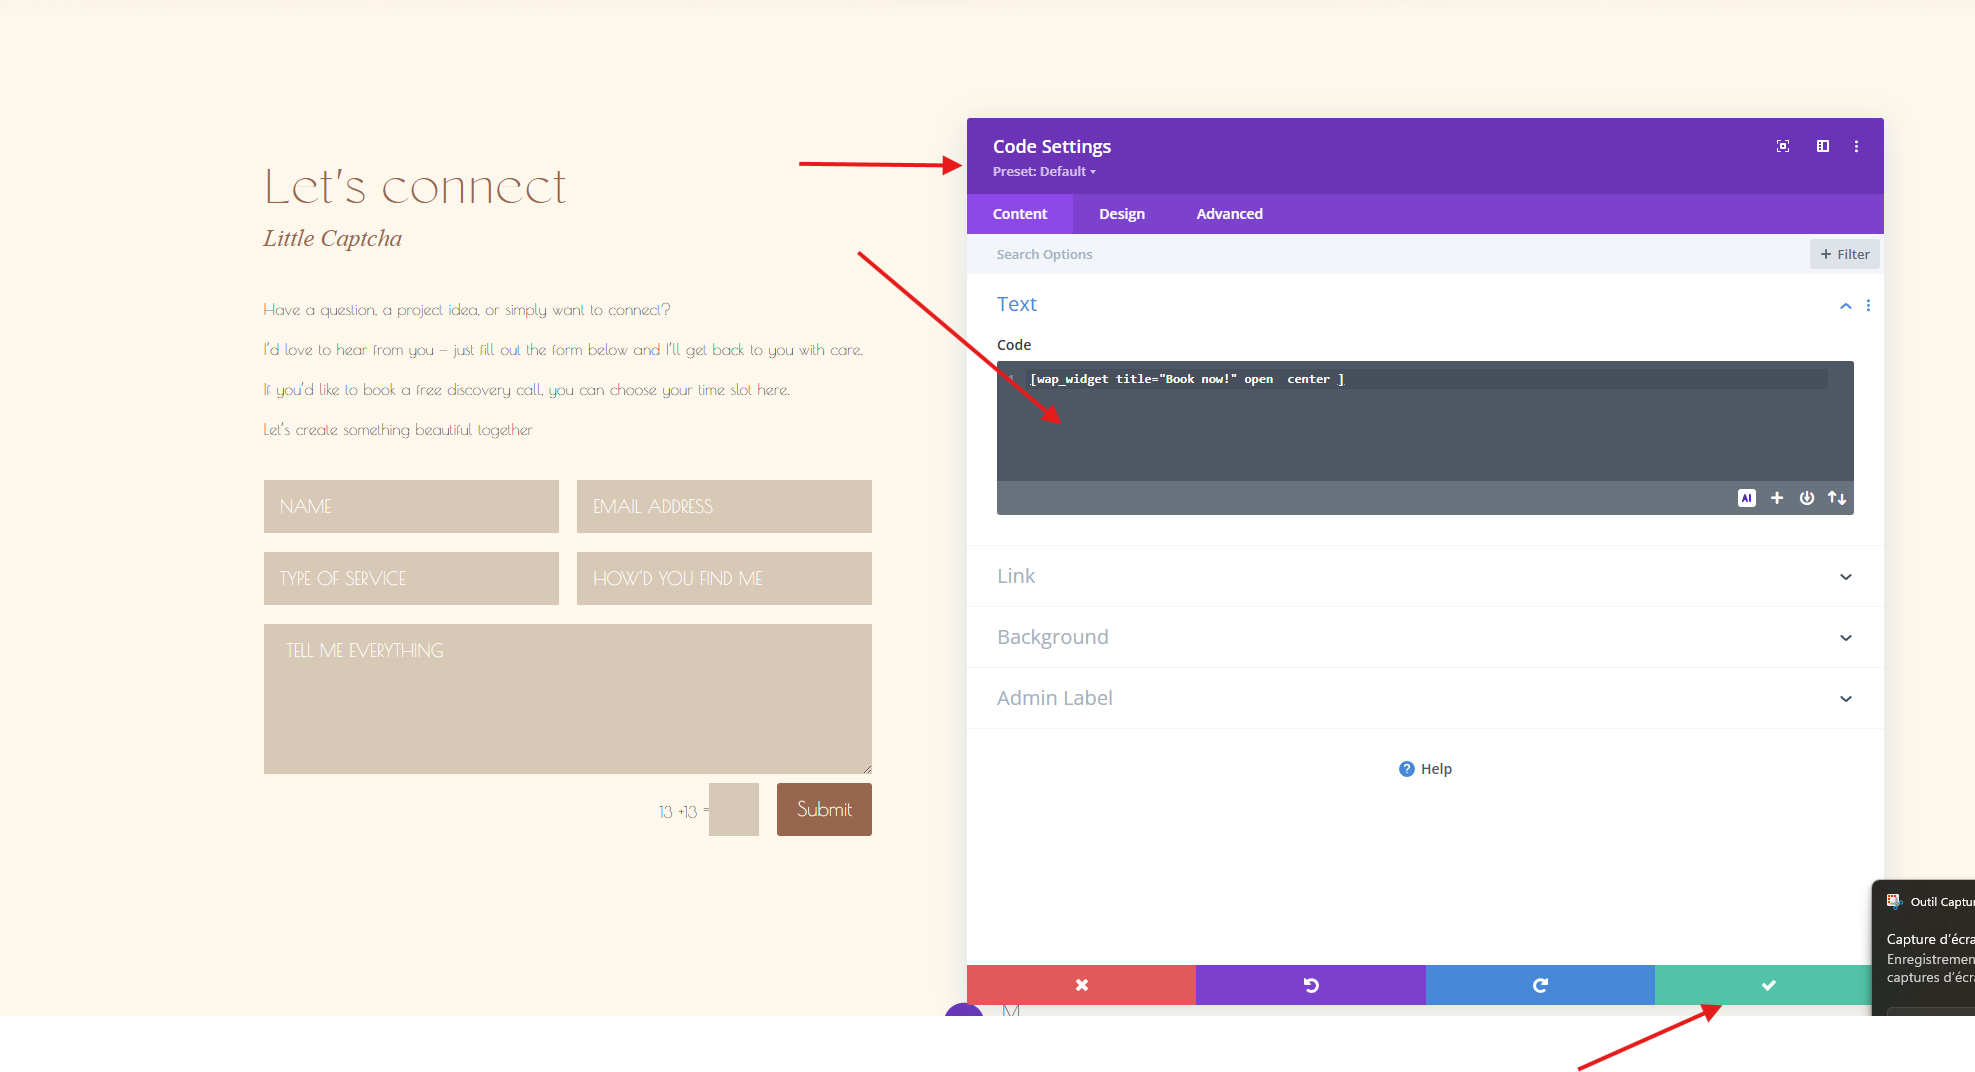
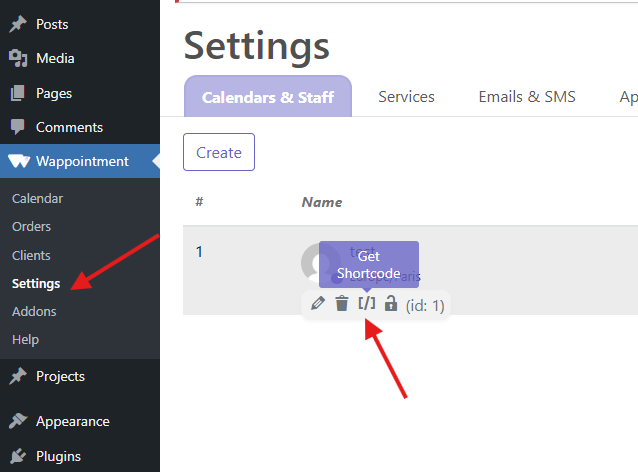
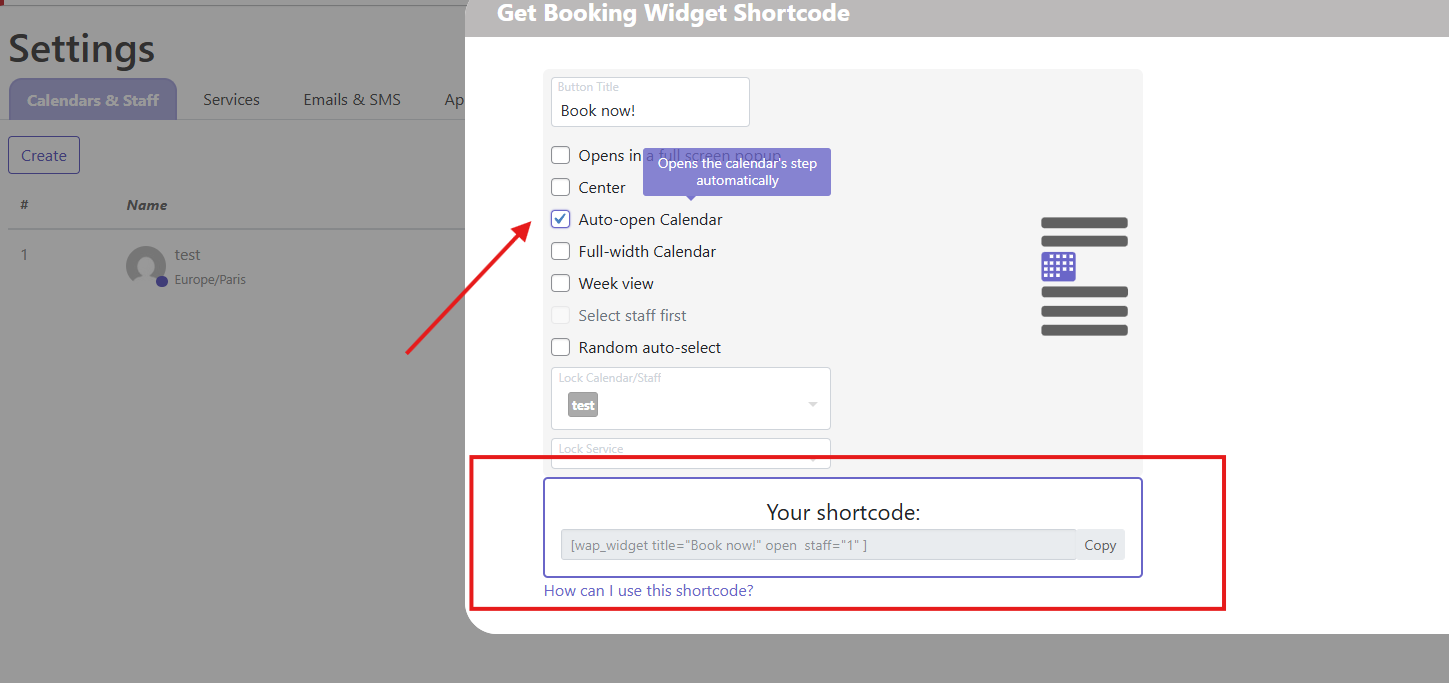
Get the Shortcode & Display the Calendar Automatically
-
In Wappointment > setting > clic on get the Shortcode
-
Tick the option: “Auto open calendar”
-
Copy the updated shortcode
Add the Booking Form to Your Contact Page (Divi)
-
Go to Pages > Contact
-
Click Edit with Divi Builder
-
Add a Code module where you want the booking form to appear
-
Paste your shortcode
✅ Done! The calendar will now open immediately when visitors land on the page – making the booking process even smoother.